Crayons & Cuties in Kindergarten Home About Me My Classroom My Shop Image Map


Monday, August 25, 2014

Clipboard Makeover!

My students LOVE read, write and count the room activities so much that they nearly wore out our clipboards last year.
So this summer I decided to get some new ones...but I wanted to make them fun and decorative!
SO....
I now have 24 boards that went from
I chose to detail how I made these boards so that if you want to 'dress up' your boards for the year you'll have the easy how-to!  This project took NO time at all- all you'll need are boards and craft/duct tape!

I also chose to highlight my brand new 'count the room' product that I made for my kinders to use to try out these boards as part of 

It will be only $1 all week!
and will be a perfect way to try out your new boards too!!!
I'll tell more about it later in the post...

SO now onto how to make the boards fun and fabulous!


and purchased craft tape from CVS (50% off this week- only $2.99 a roll) and patterned Duct Tape from a few different craft and discount stores.

Starting on the front side of the board, measure a piece that fits across the board with a little 'leftover' to hang off each edge.

make sure your first piece is lined up right on the bottom edge
You can measure/cut with scissors, but I found it easier to rip the piece off as I went along


 Once the front was covered, I flipped the board over.  Starting at the bottom corner I folded the 'center' first and then the sides to make a nice rounded corner

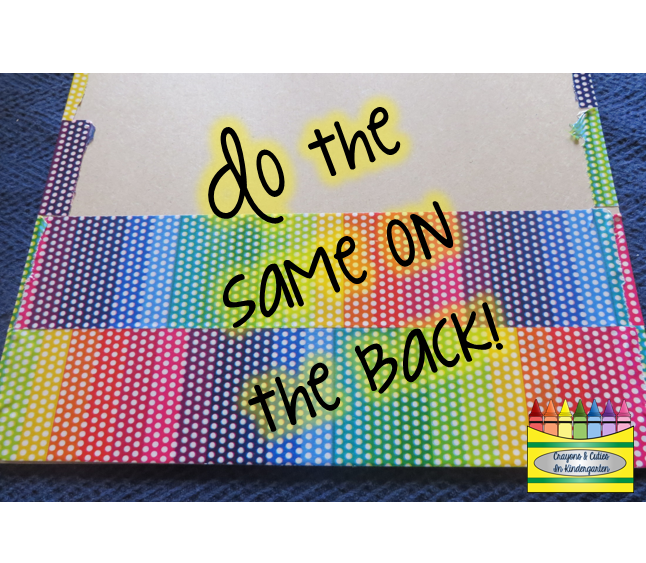
 then I folded each piece over as I made my way to the top and did the same with the top corner pieces


This is what the back looked like once all the pieces were folded over

to make a pen/marker loop cut a small piece of tape (I eyed it) and fold one edge down about half way

and then folded the bottom edge up to meet and 'seal' in the sticky!

fold it into a loop


Once the pen/marker loop is secured, cut pieces of tape to cover the back.  You want these to be a tad shorter so that it fits in the space without having to fold it over the edge (if it is too long and you have to fold it over it doesn't look bad- it happened a few times to me!)
 and here is the back all covered:

put a pen or marker in the loop!
(You can make it w/o the loop if you choose)


Now- I found that one of designs had tape that was a bit thinner so it didn't fit to the top perfectly.  If this happens to you, here is how to 'finish' off the top.
Lay a piece over the clip part... 
 and then use a knife to trim off the excess (I used a pairing knife- you could use an exacto blade)

and then 'peel' away the excess tape that was covering the clip

and when it's all trimmed it fits in neatly! 

So here are all my boards ready for fun and learning this year!

And I also made some for my sons to give to their teachers for the first day of school!
I am going to write in the teachers names and have each of them 'sign' their names at the bottom.

The poem I wrote says to 'sit down with a cup of tea' so I attached a tea bag to the clipboard too.
These adorable bags were only $1 at Target!
Now onto the $1 item for the week.... 

This is a fun way to try out those new boards!  PLUS it is virtually NO prep on your part!  Simply print the cards on cardstock, laminate and cut!
Print the recording sheets and copy- BAM- you are done!
PLUS the cards can be used for multiple activities (see below) so your 'prep' will pay off!

You will get 10 picture cards that you can tape around the room (or if you prefer they can be put in a basket and kept on a table)
 and 10 number cards
 There are 3 different recording sheets so that you can differentiate.
The first one is for students who do not need any number writing/ID assistance.
The second one has a number line on top for reference.
The third has the numbers (answers) dotted- students would simply have to trace the number after finding/counting the objects.
In addition for using it as a 'count the room' center, you could also use it for ordering numbers 1-10, matching objects to numbers 1-10 and/or as a 'partner' game.  Distribute picture and number cards to students.  Have them then walk around to find their 'partner' (match number to number of objects)- perfect for back to school and getting to know you too!

If your students aren't quite ready to use this right in the beginning of the year it is an easy one to use at any other time of the year because the 'theme' is 'school!'

This pack will be 50% off ($1) through 8/31!

Are you ready to make some fun boards for your kids for this year?
I'd love to see pictures of the patterns you choose!  There are so many to choose from- it was so hard!
And now I am thinking of ways to use the 'excess' tape!!!

This is my last week of summer vacation...I will be working in my classroom and having fun in the sun with my kiddos!  I am hoping to post 'classroom reveal pictures' but back-to-school crazies may get in the way!

Until next post,
post signature

Tuesday, August 19, 2014

Get STOMPIN'...with letter fun!

Are you ready for some romp and stompin' letter learning fun?
I gathered my cowboys and we had some YEE HAW-ing letter fun!
This get-up is inspired by Differentiation Station Creation's product:
Lucky for me, I own the clip art set she used to make this product so I was able to make the hat and boots for added fun!  If you purchase Laura's Romp and Stompin Letters pack and would like the hat and set of boots to use with it, please email me or leave a blog post comment and I will send it to you! 

I purchased this the last Back To School sale and am so excited to share with you what I did to make it even MORE AWESOME than it already is!

When you first glance at this 350 page resource you may be overwhelmed and think you don't have time to prep it- but I am going to show you some quick and simple ways to use the printables she has in this pack so that even the busiest of teachers can look like a superstar!

The beginning of the pack has all the 'feet' that you can print.  
If you take a look at this blog post by Laura you will see all the different ways the pack can be used and can see the feet 'in action!'

My newest obsession is printing on scrapbook paper!  I first did it to save ink on games I was printing (the kids were cheating and looking 'thru' the cards when I printed on white so I had to print backs) but then discovered how cool it looked in my sensory tubs.  So I wanted to give it a try with this pack too!


I decided to focus on ordering the letters in our names so I put all the feet that had the letters in Thomas' name on the floor upside down.

He would turn one foot over at a time.  If he got the letter he needed he put it up top.  If it wasn't the next letter he flipped it back over.


He continued until the whole name was complete!


Although I didn't get a picture of him, he then 'walked his name' (boots and hat in all!) and said the letters!

You could do with with CVC words, sight words and more!
So although the pack may, at first, appear to be best suited for those learning their letters, here is another way to extend it and use it for differentiation for your more advanced students!

Next I dove into her printables!  There are so many to choose from!

As you know, if you have been following my posts, I am beginning to dive into sensory table/tub fun.  So I wanted to use my little cowboys as 'guinea pigs' for some of the activities in the pack and turn them in to sensory activities, as well!

So I saved the scraps from the feet I had printed and ran them through my shredder....
I also had the scraps from trimming the papers to make them the 8.5x11 size for printing
 which gave me this nice colorful mix of shreds...

Now I did not throw away all my junk/bill shreds that had already been in the shredder.  I simply bagged them up to be brought into school for more sensory bin fun throughout the year!

Not everyone has tubs/tables, so I wanted to show you how easily you can turn this into a sensory tub activity...I grabbed a cardboard box from our recycling bin...
 and threw the shreds and some letters into the box!
I happened to have both size letters at home...you can use whatever you have because both sizes work great!

Calling in the cowboys....
And they started to dive right in!

For this activity I chose to use one of the 'WANTED: Tall Letters' printables Laura has in the pack.  We grabbed some dot painters because they make EVERYTHING fun!


Reach in, grab a letter, see if it is on the paper!
If it is, dot the letter and then return it to the box!

When he found this letter he said 'I can do both!' (capital and lowercase)
 

And when all letters had been found the WANTED poster was complete!

But if you are afraid of little shreds of paper invading your classroom, try making shredded paper 'mystery bags (and/or cups)!'

I used the same scrapbook paper shreds but this time I put them in a gallon size ziploc bag.  I used the small magnetic letters for this activity and put them in the bag too.  I sealed it up- leaving 'the air' so that there was room for the shreds and letters to mix around.

You can also use cups with lids!

I chose to use Laura's WANTED printable again- but this time it was to sort letters in Jonathan's name and letters not in his name!

I handed him the bag and had him 'shake it up!' 

Jonathan is 3, and although he knows the letters in his name and alphabet, I provided him with a name tent since all my magnetic letters were capitals and he has been practicing using lowercase.  When he found a letter he would tell me what he found and then reference his name tent to see if it was in his name or not.
 He wrote the letters on the printable


And when he was all done had sorted the letters he 'found' by those in his name and those not in his name.  The letters never came out of the bag, nor did the shreds, and it was a fun NON-MESSY activity!

My cowboys, as you know, LOVE their playdough!  So I chose to use Laura's 'Stamp It' printable with playdough stampers rather than ink stampers!
These stampers are from Lakeshore, but if you have 'ink' stampers already in your classroom, you can use those, as well, in playdough (just give them a good sudsy bath beforehand!)

I took one of the printables from the pack and stuck it in a page protector.  When I get to school I will put the entire packs worth of these 'stamp it' activities in page protectors and store in a binder for easy access/use throughout the year!

I put a lump of playdough, a roller, dry erase marker and the stampers needed for this printable in a plastic tub.
He pulled a small piece off and rolled it out...

said the letter and then found it in the tub and pressed it in the dough


Then he wrote the letter using the dry erase marker.  He had some trouble with the 'g' so I dotted it for him to trace. 
If particular students need guidance, you could put yellow highlighting for each letter and then slip it in the sleeve.  Students could then 'trace' the highlighting with their dry erase marker!

We chose to use different colored dough, but you could have just 1 color!

And here it is all complete!

There is so much more in this pack and so many other ways to use it creatively!
I asked Laura and she is letting me give away 1 pack to a lucky person so that they can have some creative romp and stompin' letter fun!

So, how can you win??!!
It's really quite simple...
Use the letters in:
BACK  TO  SCHOOL  IS  HERE  AGAIN
to make a new word!
(you cannot use any of the words in the phrase individually as your word)

Comment on my facebook page contest post with your word and email address.  
Tomorrow (Wednesday) evening I will select a winner!

Speaking of tomorrow...you get a second chance because TPT is hosting another site-wide sale!
My entire store is 20% off from Tuesday 8/19-Thursday 8/21

AND if you read this before midnight Tuesday don't forget about the $1 deals from...

where you will find my
 and
for just $1 each!

Best of luck with the contest to win Laura's pack!
Happy Shopping!
And have a fabulous back to school!
Until next post,
post signature
Related Posts Plugin for WordPress, Blogger...