Crayons & Cuties in Kindergarten Home About Me My Classroom My Shop Image Map


Wednesday, February 19, 2014

Composing Numbers....Why Not Another Monster?!!

So after posting the directions here and 'how to' pack for free on TPT about the decomposing numbers monster, I got a few questions and requests for a composing numbers version!

Luckily my boys eat cereal bars like they are going out of style, so I had another box (or 2) on hand, grabbed the card stock and got to work...and here it is!

If you made the decomposing monster, this one is a breeze!

Grab a cereal bar or cracker box (other boxes are going to be too tall), scissors, tape/glue/stapler, a knife, and printables (don't worry...I'll post the link at the bottom for you to grab them for free!)

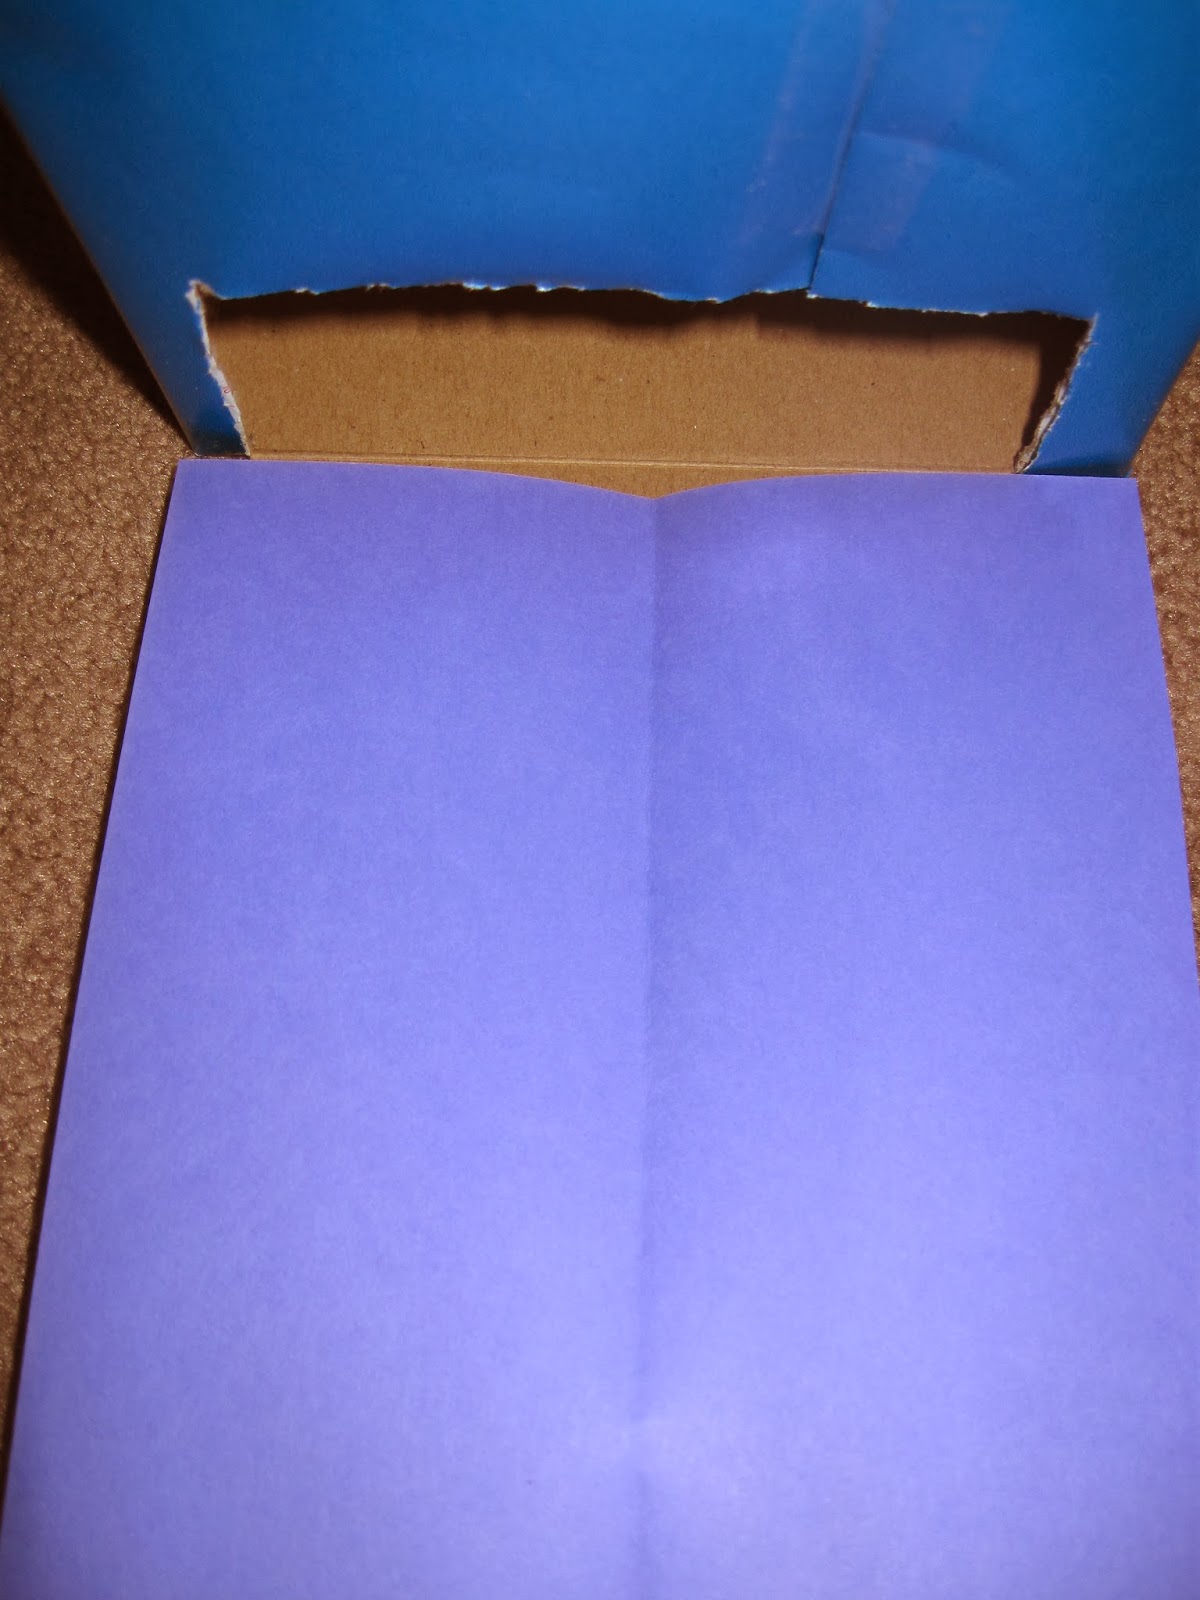
Cut the flaps off the top of the box and then cut out a rectangle in the front using the knife.  Make sure you leave a 'lip' on each side to catch the card stock. as well as the bottom in tact to catch the manipulatives

Next measure the size of your box to the piece of card stock


Cut and retain the 'scraps'

 Put the piece in the box and make sure it 'curves' to form a slide.  Secure with tape at the bottom.  Fold over the edge on top and either tape the excess down or cut it off.

Next measure the size of the top of the box (where the 'mouths' will be).  When measuring leave extra on both sides...
 ...as seen here....
 ...so that you can bend and form a place for the piece to sit nicely/attach to the box.

Next cut out a rectangle shape (or circle) on each side of the top to form the 'mouths.'  I like to fold the piece over and cut out a square so that when I open it...
...I get a nice big rectangle.  Repeat on the other side... 
and place on top of the box.

Secure to the box with tape on all sides/edges.

Time to turn this box into a monster!
Add the monster printable head and feet to the box, as well as his 'feed me' sign!
For this composing monster I chose to have his feet/bottom of his mouth come out from the bottom of the slide as a way to 'catch' the sum, but you can choose to do it differently if you'd like!

Now it's time to compose some numbers!

Put amounts in each hole/mouth...
 ...and what comes out is one set/sum!

And I can record my findings on the recording sheet:

So are you ready to make yours??!!!

and if you haven't already gotten the decomposing number 'how to' and printables, you can find it here:

Feedback as a form of appreciation is greatly appreciated!

If you have other fun and innovative ways to teach composing and decomposing numbers, I'd love to hear about it!  

Looking for more fun freebies! I am linking up with Teaching With Nancy this week for Fun Friday Freebies!
Click here to find more freebie fun from teacher authors and bloggers!

Until next post,
post signature

Tuesday, February 18, 2014

'Math Madness' for Valentine's Day and More!

My kinders have been working hard with ten frames, numbers to 20, using a 100s chart and counting on from a given number- all concepts that can be hard and confusing!
Being it was Valentine's Day week, we broke out the conversation hearts, egg carton ten frames, and more to make these concepts more 'sweet' and 'lovely!'

In math centers my kinders worked with their egg cartons as ten frames (a great idea I got from Differentiation Station), but this week, they got 2 of them!  Each kinder also got a cup with 20 conversation hearts.
I pulled a number card (you can find them for free here!) and had them ID the number.  They then had to show me the number using their conversation hearts and ten frames!


Once we practiced with a few number cards, they then completed their 'color by ten frame' activity!

My students have been using them for a few weeks now!  They love them and they are now at the point where they can complete them all on their own!

Here is a sample from my 'color by ten frame' winter set!
(click to download)

My kinders have been having so much fun with them I now have sets for Winter, Winter Sports, Valentine's Day, President's Day and 100th Day and am hoping to have a spring, St Patty's and general set up soon!

But that wasn't the end of our 'SWEET' math and number fun!

We used those hearts again to find numbers in a 100 chart to reveal a mystery picture!
As I called out numbers, my kinders placed a heart on top of the number.  I also had a large 100 chart displayed on my Eno Board and I colored them in as well to help students that were having trouble finding the numbers.

After we wrote what we found, I had them pick up the hearts, one by one, and color to mark the spot. 
 Once all the heart spaces/numbers were recorded, our picture was officially revealed! 
And those heart markers....became a tasty treat to reward amazing math work!

We'll be doing something similar on the 100th Day...but instead of a heart, we'll be finding the number 100!

So how did we get to the 100 chart...it wasn't easy!  We have been working on it for awhile!
Before the lesson above, we had some marshmallow fun!

Here in NY it has been a LONG, COLD and SNOWY winter!  In my house we have been surviving with lots and lots of hot cocoa....and marshmallows!  One day while sitting and sipping with my boys, the idea of a marshmallow 'revealing' a number came to me!
I have a mug with a 100s chart on it and then marshmallows with a box cut out that just so happens to match the square on the 100s chart perfectly (it only took about 5 tries!)
I had my kinders work in pairs.  I called out a number- they found it and 'highlighted it' with the marshmallow!  We practiced that for a bit and then I started to ask them to slide the marshmallow to show what number came before/after!

 Somehow those hearts made their way into this too (they were eyeing the counted out cups on my table in preparation for the week!)!  One partner covered a number with the marshmallow, heart, or marshmallow heart and the other then opened their eyes and had to figure out the covered number!
It worked better with just the heart- so they knew what they needed more than I did!  The marshmallow covered the number before and after a bit too much, but the heart worked out just fine!

We later moved onto an individual activity...

I selectively plucked 20 numbers from our 100 chart and handed each child a number (this helped me with differentiation too- those children struggling with numbers got the smaller numbers- and those ready for a challenge got the higher numbers).  They had to write the number on one of the marshmallows and then write the number that came before and after it on the other marshmallows!

They glued the marshmallow with the number I gave them in the middle of the cup... 
.
..and the other numbers went before and after to show the numbers in order!

To help students that were having difficulty I gave them a number line and indicated the given number (with a crayon wrapper scrap!  Oh how we find ways to make things work, right?!)

if the number was larger than the number line I had, I had them use our number finding monster (he is also a word and letter finding monster for ELA activities!) and the large 100 chart to help ID the numbers before and after!

So when it was all done, each child has a marvelous mug of ordered marshmallows!


and my math bulletin board is now complete!

Find all the marshmallow goodies and more in here:

And to wrap up our week of SWEET number fun we had our Valentine's exchange...and as I had blogged about on February 5th we completed them by having students number their valentines from 1 to 20!
It was A HUGE SUCCESS and I can't believe it took me 13 years to 'perfect' our exchange!
It was smooth, flawless, calm and fun!  Only 2 students needed help- all the others were able to find and place their valentines in their respective bags all on their own!

Here they are waiting to be filled....
 I had them across the front of the room in number order.  The girls were numbers 1-7 and the boys 8-20- that was an afterthought!  I had a parent write me that her child had bought separate girl and boy Valentines! Ahhh!  So I sent a quick note out with our changes and everything else fell right in place!

After everyone was done exchanging, I stapled the tops of our VERY STUFFED bears!
They sat out in the hall- back in number order- and as they children left, they grabbed their bag and headed off the to the buses for a week off- as it is Mid-Winter Recess break for us in NY!

I am linking up with Teaching Momster for a 'Math Madness Wednesday' Linky!
This week's theme is '10 Frames'!
If you are looking for more information about teaching and using 10 Frames, be sure to click this link and follow the other links!

Until next post,
post signature

Saturday, February 15, 2014

Decomposing Numbers....we can run from it...or ATTACK it!!!

Last year was the first time I ever had to teach 'decomposing numbers' to my kindergarteners...and let me be honest...it was also the first time I had ever heard of it!
To say it was a train wreck would be an understatement!
As I taught the kids I was teaching myself- and I made PLENTY of mistakes!
So one of my professional goals for this year was to make sure I taught this better!

Summer came and went, Christmas break came and went...and now...the decomposing numbers unit is creeping up on me!  AGGHHHHH!!!!
Ok- so how am I going to teach this concept to my kinders so that they UNDERSTAND it...but even more important...how am I going to make sure that what we do with it is FUN?!!

So I thought and thought and was staring at a box of Monsters Inc Cheez Its and it came to me!  MONSTERS!  It's perfect!  Last year I felt like I was being 'attacked' by decomposing numbers so a monster theme was quite fitting!

I scoured the house, grabbed what I thought I would need, a bit of trial and error and WAL-AHH...
A Decomposing Numbers Monster!

So...how did I make this guy??
Grab a cereal bar box (or crackers- cereal boxes were too tall), a sheet of card stock (1 works great for this size box- you will need 2 sheets if you use a bigger box), monster printable, scissors, a knife, tape and some wrapping or scrapbook paper!

Now...time to get to work!
Cut the top tabs off the box

If you want to wrap it, do so now.  If not, leave the box as is (I made one of each- both are cute and work the same!)

Use the knife to poke a hole into the front of the box- be sure to leave a 'lip' on the side- and cut out a rectangle-like shape. 
If you wrapped it, you will need to tape the paper to the box here.

Repeat on the other side.  This is a birds eye view of what it should look like when you are looking into the box after both sides have been cut.

Measure the cardstock to your box.  I put a little fold so that I knew where to cut.

Cut off the excess and then fold that piece in half- this will make the slides- but keep the cut-off- that will be your divider!

Trim a bit from each piece- to make room for the divider.

Put the first slide in- tuck it into the side and secure with a piece of tape.

This is the view from the top- see how it 'curves' as it gets to the bottom to make the slide!

Trim the excess from the top and secure with a piece of tape (or staple).

Do the same for the other side/slide, but be sure it is going the opposite way!

Put the divider in-between the 2 slides- basically just slide it down between the two.  Trim off the excess. 

Secure both the top of the divider...

...and the bottom with tape (tape it to the slides on the bottom and the box on the top).

Attach the monster head to the back of the box using either glue or tape (you may want to print it on white card stock so that it stands a bit better).

Glue/tape the monster's mouth to the front of the box- lining it up with the top of the box.

Now your monster is ready to decompose for you!

Feed him some counters (or chips, cereal, marshmallows, etc!)...

...and he will decompose them for you into 2 groups!

Play it over and over to see all the different ways he can decompose numbers!  Focus on just one number (ex how many ways can we decompose 5?) or let your students explore with varying amounts and make their own discoveries (ex. I gave him 6 and he decomposed it into 3 and 3 and then 4 and 2!)

We aren't up to the unit yet, but the kids spied the monster on my table, so to build excitement...
 I let them give it a try!!!


So now you are probably wondering...how can I print all these instructions?  And how do I get that monster?

Easy for you, I put all the pictures, monster template and directions into a PDF...but better yet...I also put in... 
a recording sheet and...printable for making class posters...

and it's FREE!

Click here to download it from my TPT store!
To show your thanks, feedback is always appreciated!

So now it's time for you to head over to TPT and get your pack!
I would love to hear how these monsters were used in your classroom and/or any thoughts you have about them!

Now...the only screams we'll hear in regards to decomposing numbers should be those of excitement and joy!
I am linking up with Teaching Momster for the Wednesday Weekly Math Link-Up!
This week's link up is all about decomposing numbers!
Click this button to read more!

Until next post,
post signature
Related Posts Plugin for WordPress, Blogger...