Crayons & Cuties in Kindergarten Home About Me My Classroom My Shop Image Map


Showing posts with label Bulletin Boards. Show all posts

Monday, August 17, 2015

First Day of School Books and Activities

I can't believe my brain is beginning to get into 'back to school' mode!

This year my little guy starts kindergarten and my older goes into first, so yesterday while at our local library attending some WONDERFUL summer reading club programs we also picked out some 'school' books!

The kindergarten book choices were easy for me- I have ALWAYS used:
The Night Before Kindergarten
Miss Bindergarten Gets Ready for Kindergarten
Look Out Kindergarten, Here I Come
and
The Kissing Hand

 but was happy to find some new ones:
Kindergarten Rocks
and this HYSTERICAL story (since I am a boy mom):
19 Girls and Me!
(This would make a great mentor text for writing too- be sure to check it out!)


For my soon-to-be first grader I was going to get
First Day Jitters
but it was out!  I didn't know any other first grade books, so I searched and found:
Pirate's Guide to First Grade:

OH MY WORD!
This book is GREAT!!!
It tells about a boy who truly believes he is a pirate (and speaks 'pirate') for the moment he wakes to 'a slobberin' moist mornin'' (aka his 'great scurvy dog slurped me kisser when I was tryin' t' get me winks!') til his 'captain' (teacher) hands him 'a map where X marked the spot' and he found 'me treasure!'

The illustrations are amazing!  The boy and his surroundings are all in color but then there are pirate illustrations scattered throughout!
The back cover defines all the 'pirate expressions'- I learned a few new ones!

Since I already had a
'Miss Bindergarten Gets Ready for Kindergarten'
printable activity for you all to download, I felt the need to create one to go with 'Pirate's Guide to First Grade' for all the first grade teachers out there!

I had my boys give both a try!

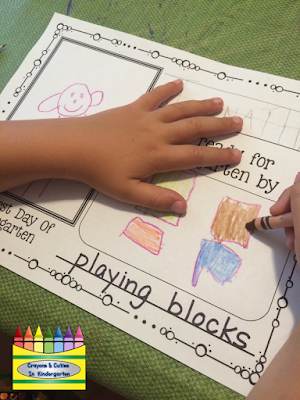
First my soon-to-be-kindergartener did the activity to go with Miss Bindergarten:
I L-O-V-E his self portraits!

He added his picture and I wrote his words.

He is all ready for kindergarten!

Next my soon-to-be-first-grader tried out the pirate one I just created!

Before he started I printed the papers and then put a dotted line around the shapes to make cutting less 'stressful!'  You may want to do the same before copying for your students!

We have already read the story a few times, so he was familiar with all the items on the page!
He went right to coloring! 

Then drew himself as a pirate (look at the hook!!!) and started 'decorating'! 

He can't fill in any of the writing yet because we don't have his teacher's name, room number and he hasn't had a 'first day adventure' yet...so it is ready for after Day 1!
Don't try to take that treasure...the sword is set to go down on anyone that tries!

So here are both to download for free:
You can take pictures of the students to put in the frame or have them draw themselves as your 'beginning of the year' self-portrait!

For the pirate one I also included some pirate 'props' to be added to the photo/illustration!

These will make a great Open House/Meet the Teacher bulletin board display too! 
(If you have students with your before those events- we don't have ours until 2-3 weeks into school so parents 'expect' to see their child's work hanging about!)

You can also bind all the pages together to make a class book the students are sure to re-read all year long!

So I hope these make your first day/week planning a bit easier and I hope your new year is 
'A Fiddler's Green!'
(you'll have to read the book to find out what that means!)

Until next post,
post signature

Saturday, October 18, 2014

We Went 'Batty!'

This week we learned all about...

BATS!

This was the first year I really dove into a unit on bats and boy did we have fun...and learn a lot!

There were several books I used this week- both fiction and informational- about bats!
Here are a few we used to learn about bats:


And a few others that we used for read alouds and/or as mentor texts for Readers and Writers Workshop:


(BTW I checked and all of the titles above can be found on Amazon if you, or your local library don't have them!)

As much as I would have LOVED for my kinders to try hanging upside down, I am not that adventurous, so I had them lay on the floor, wrap their 'wings' around themselves and I stood over their heads!  We also practiced 'flying' like bats and..of course...tried out our screeching!

We charted what we learned on a huge bat 'can, have, are' chart:

The first time we wrote on it I used purple and then after reading a few more books and watching some videos we added what we learned with the orange marker.  I did this to show them how authors can add to their pieces as part of our Writers Workshop lesson one day.

We also used interactive writing to label the parts of a bat:

What I LOVED was that my kinders were EAGER to add other parts to the bat that I did not originally have on it...

Including...
fingers and its thumb....

AND..my favorite...
REAL FUR! (aka pulled pieces of brown burlap that I had in my craft closet!)

I put it together in this collage so that you could pin it as 1 image to reference later on!

We used some fun songs and learning videos I found online this week too!
The first up is Bats, Bats, Bats!  It is a fun song with great real photos of bats!  The tune is catchy!  My kinders loved it!

The next taught all about echolocation- which my kinders LOVED saying!


The last one is from PBS Kids.  It is a bit long and better for grade 1 but has some interesting bat facts.  My kinders started to lose interest after a bit..and just wanted 'the singing bat movies' back!

But that was not the end of our bat learning and fun!

Our 'Poem of the Week' was from DeeDee Wills' Poetry Pack- the October Poetry Stations- called 5 Little Bats:
Our sight word this week was 'the' so we found it with highlighting tape.
I also had a 'bat snatcher' each day who stood near the pocketchart as we read it and 'snatched' a bat each time we got to the line 'One flew out to find a snack...' until all the bats were gone.  

I wanted a fun display for our bat fact chart and interactive writing but needed a little something more!
I came across this pin for a bat tracer:

but decided to add the kids faces to the bats rather than the googly eyes!

After they cut out the bat, I glued on their face and cut around the ears.  I folded the wings and put a staple in the middle (see below).

Each child wrote a bat fact and I 'hung' their bat from their fact:
This bat fact was inspired by the 'Poem of the Week!'

So proud of her spacing and sound spelling!

They LOVED to write about the bats sucking blood!

And once all were hung we had a...

We learned that bats are not really blind...they just have a hard time seeing in the dark!  But we talked about how hard it would be for a bat to see teeny tiny writing...what could a bat use??

MAGNIFYING GLASSES!
So we tried out a new 'I Spy' type of activity using a bat theme:


We use 'Fundations' to teach letters, so we have covered t,b,f,n,m,i,u,c & o so far.
So I hit those letters (6pt font) in the bat picture and then put pictures of items that start with those letters on the bottom of the page.  They had to...

and then... 
I had them 'x' each letter as they found it on the bat so that they would know which ones were already used.  They loved it!

Want to try it out with your kiddos?
Here it is for free:
Just right click on the image and copy it into a new document or save it as a picture and insert it into a new document!

Here is the bat fact paper I used too, if you want that:

Next week they will do a similar activity independently in Phonics Center, but our theme will be pumpkins, so I created this one for them to do and added the 2 new letters (a and g) that we will learn next week into the mix:
Feel free to use this one, as well! 

There is so much more I would have loved to do with bats but we merely ran out of time!  Next week we are onto pumpkins!  I have a bunch of fun things planned...be sure to stop by again!

I will be blogging on The Primary Pack on Thursday 10/24- my first post!  I'd love for you to swing on by- planning a 'dough' lot of fun and some freebies!

Until next post,
post signature

Thursday, September 25, 2014

Getting to the 'Core' of our Apple Unit!

This (short) week we finished up our apple unit!  We only had 3 days of school this week, but it was full of tasty fun and learning!

We continued this week with one of my favorite apple 'go-to' poems:
We have been working on finding our sight words in our poems with highlighter tape!

I also had the poem in the pocketchart where we changed the quantity and size/color of the apples for some fun re-reading!  I didn't get to take a picture of it though!  Sorry!

Last week I shared how to make the apple core labeling project (click the hyperlink to find the how to!) that I had prepped and ready to go!
I made a really large version so that we could use it for interactive writing.  This is our 3rd week of interactive writing and they are really starting to get it!


For those students not coming up to share the pen, I had them draw the 'core' and label along with us:

When we were all done I had them decide if they wanted to make a red, yellow or green apple and handed out the pieces.  Once they 'built' their apple they used our large apple core model to help them label their own core.

Our display is 'apple'-solutely delicious!!

Last week we tasted apples to graph which we liked best.
This week we used the rest of the apples to make applesauce!

We read Who Will Help? 
which is a 'Little Red Hen'-ish version about making applesauce!

We went over plastic knife 'safety' and then they all got to work!
They knew that if they did not use the knife correctly they would lose it...and if they didn't help make the applesauce, they wouldn't be able to eat it (from the book!)!


I cooked it with skins on...there was no way to peel and get them all set for my cherubs with my 'solo act'!  The sauce was a bit chunkier than in the past, but was just as delicious!

I added some water, cinnamon, sugar and a dash of apple pie spice!
It boiled and then simmered for about 2 hours...our room was the talk of the hall!

While they were at their special, I spooned it out so it could cool and it was waiting for them when they returned! 

A few were skeptical because of the brown color, but most ate it all up!

Since our school is out on Thursday and Friday this year for the Rosh Hashanah, we 'celebrated' Johnny Appleseed's birthday on Wednesday by making some apple pie playdoh!

I used my 'go to' no-cook playdoh recipe from Imagination Tree and added a container of apple pie spice to the dry mix (I doubled the recipe and used 1 container of spice for the double batch) to turn it into apple pie playdoh!

I don't have any pictures of the process of making it because we were in a rush, but it is similar to how I made the coconut playdoh and magic playdoh just with the added container of apple pie spice!

It was a HIT!  We had apple pies, apple pie rings, apple pie bracelets, apple pie snakes, apple pie snowmen, apple pie baseballs and so much more!


And even an apple pie unicorn!!
They were so excited that they were able to take it home too!

We will use that playdoh again next week in centers!
I just made another batch at home for my sons to play with, so we will have some extra for school!

We use Fundations, so we have covered t, b and f so far.  Next week we will work with n and m, but I am having them work with t, b, and f in playdoh center.

Two years ago I wrote a Donor's Choose project for playdoh stampers from Lakeshore and it was fully funded!  I have 3 sets of lowercase, 1 set of uppercase and 1 set of numbers.  I also got their rollers which are PERFECT for little hands!!
The only problem was storage...so my husband made me these stands!  

 There are several ways I plan on having the students use the dough and mats!

They will match the uppercase letter to the lowercase playdoh stamp...

They can also use the playdoh to form the letters they need (and if you don't have stampers, this is a perfect way to do this activity too!)...


Since I have all different levels, I am able to use the same mats to differentiate my instruction:
They will all appear to be doing the same activity, but I can guide it to match what each one needs to work on right now.

 So what if you don't have playdoh stampers?
Regular 'paper' stamps work just as well...

And you can also use magnetic letters pressed in the dough... 

 And if you don't want to venture into playdoh center yet, you can use the mats without dough: 


My kids will also record the letters they stamp for a bit of 'handwriting' practice using this recording sheet: 

And I will have this available as a center extension/early finisher activity.  I doubt many are going to choose to do this when there is playdoh out for them to work with!  If I see no one has completed it, I will use it as a morning work activity the following week!

All of the mats, recording sheet and printables can be found in my Apple Playdough Pack:

I just finished my Fall set too- perfect to use with pumpkin pie playdoh!


Both the Apple and Fall sets are 50% off until Saturday morning to celebrate Johnny Appleseed's birthday!

I'd love to give one apple set away as a Johnny Appleseed birthday gift!
Leave a blog post comment about your favorite apple activity, project, craft, etc!
I will randomly select a winner the evening of 9/26 (Johnny's birthday!)

My boys and I were supposed to go apple picking today, but Mother Nature has planned an indoor day of fun for us, so I am off to go make some apple pie playdoh creations with the 'apples of my eye!'

The adorable apple images you see on my pictures are from My Happy Place's Apple Clip Art set!

Until next post,
post signature
Related Posts Plugin for WordPress, Blogger...