Crayons & Cuties in Kindergarten Home About Me My Classroom My Shop Image Map


Showing posts with label Craftivity. Show all posts

Sunday, March 20, 2016

Easter Fun!

Happy Spring!
They are predicting a winter storm here in NY, but my mind is on Easter and Spring!

Here are a few things I will be doing with my kids this week!

First up are these adorable cards!
These are pictures from last year and they came out so super cute!


I gave each child 2 pieces of 8.5x11 white construction paper that I stapled together.
I showed them out to make an oval that 'holds' the staple.
They then cut the oval out.
They decorated the oval to look like an Easter egg (I had a few books with pictures to show them different examples of how eggs could be decorated.) 

I had them flip the egg up and on the 'inside,' or other oval, I showed them how to make a bunny face using directed drawing.

For some kids I drew a faint line for them to cut (just make sure you open it before they cut or they will cut through the rabbit's face too!)
For others, I did the cut.

I then had them add pink to the middle of the ears!


We pasted them to spring-colored construction paper 'cards' and then wrote a message inside.

Next is this fun center!

I saw an idea on Instagram posted by Mrs. Jones's Creation Station about using the carrot 'eggs' and letter beads, but it was only for letter ID and my kiddos are past that, so I modified it a bit!  (You can click the hyperlink and see her post and grab her free printable!)

I found the carrots at Michael's Craft Store (although I hear they are also at Dollar Tree and Walgreens!)

and filled them with black beans and the letters the kids would need to complete the printable.

Because I have kids working at two different levels right now (ready for CVC words and those still working on identifying initial sounds), I made two different versions.

They will shake the eggs, find a letter, ID the letter and then find the picture that begins with that letter.
If completing the CVC printable, they will tap out and write the entire word.
If completing the initial sound printable, they will simply write the lowercase letter (beads are upper) to match the picture that begins with that letter sound.

You can find the printable FREE by clicking HERE!
These are the letter beads you will need:
b, c, f, g, h, j, k, l, m, n, p, r, s, t, v, w, z

If you don't have letter beads, you can use dried lima beans and a sharpie to write the letters and then put them in the carrot/egg with the black beans as 'filler!'

Next up is a gift I will be giving my students on Thursday!

On a recent Target extravaganza, I came upon these boxes of PlayDoh and Spring Fruit Snacks
The fruit snacks were $1.99 for 12 packages and the PlayDoh was $5 for 10 eggs of 'doh!'
(You can also whip up a batch of homemade playdough and put that in plastic eggs from the dollar store if you are trying to conserve some cash!)

I put a bag of snacks and a 'doh' egg in a candy bag and stapled a little ditty on top and 'signed' the back:

Super cute, not too sugary and fun! 

If you'd like to do the same, I put the tag in this FREE download!
(It has a blank spot to sign your name and I made a version for 'her' 'his' and 'our' class to accommodate everyone!) 

Here are a few other things we will be doing this week:
Last year we used this the cute image created by Graphics From the Pond as inspiration for this chick drawing!  They used a black crayon and then let them paint!

These rabbits were also directed drawings that we painted!

And if you are planning on dying eggs with your students (or own kids) this works GREAT!
I got the whisk from the Dollar Store...Just slip in the egg inside and let them dunk it!
Less spills...splashes and cracks!

Be sure to check out my other posts for 10 Ideas Using Plastic Eggs and Using Dollar Spot Finds for Spring Centers!


'Hoppy' Spring!
Until next post,

Wednesday, January 20, 2016

100th Day Take-Home Project

Last year I had my students complete a 100 Days Take-Home Project:

I was scheduled for parent/teacher conferences on our 100th Day so I was BUMMED I could not do my traditional 'make and wear something with '100 things' on it.

*********************************************
You can read all about my usual '100 Day Fun' HERE!
*********************************************

I had done '100 collections' before but they always seem to cause drama or heartache is a favorite toy, sticker, etc goes missing!

SO, I decided to make their 100 Day project somewhat similar YET still allowed for creativity!

As you can see I got many different interpretations!

About 2 weeks prior to our 100th Day I sent home a note explaining the project, a copy of the gumball machine base and a 12x18 piece of white construction paper:

Many chose not to use the construction paper, but I wanted to provide it in case a family didn't have the means to get a piece large enough!

As the projects came in the students explained what they used and how they made it and then it got displayed outside.

I did have a handful of children not return the project and I gave them the option of making one at my back table during indoor recess so that they didn't feel left out!

If you would like to do this project, I have included the letter and gumball machine base in this FREE DOWNLOAD!

Want to make the 100th Day even sweeter?
Here is a fun treat to send them home with:
It is FREE in my TpT Store!

And speaking of Teachers Pay Teachers...
is going on NOW!

PLUS I have extended the 20% off EVERYTHING sale in my store through Friday January 22nd!

You can find all of my 100 Day Resources, Winter, Black History and more by visiting the Custom Categories that are outlined on the left-hand side of my store:

Hope your 100th Day is BUBBLING with FUN!
Until next post,

Thursday, January 14, 2016

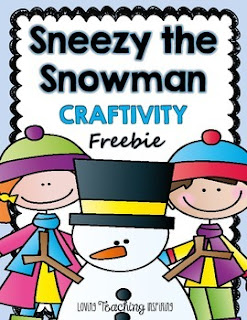
'Sneezy the Snowman' Visits Our Class!

Do you know this amazing winter story?

I was introduced to it last year when I read this blog post on The Primary Pack by Kristen from Loving Teaching Inspiring.
It is actually one of the top visited blog posts on The Primary Pack!

I had never heard of the story but the project looked super cute!

Unfortunately due to so many snow days last year I never got to do it- HOW IRONIC!!

So this year I was determined to include it in my plans!

So this past week we read the story and used it as a springboard for discussions about items that are hot and cold.
We talked about what melts snowmen (things that are hot) and what would be good for a snowman (things that are cold).

We spend 20 minutes at the beginning of our writing block each day engaging in interactive writing.  We are also working on making lists, so we made interactive writing lists this week that were inspired by this book!


Although I loved the idea of the puffy paint for the melted snowman, we simply did not have the time to fit it in, so I opted for construction paper projects.

I showed them how to make a 'melted snowman' and we talked about all the different things a snowman has and would be found in his/her 'melted puddle'

Then I let them get to work!

While they were constructing their snowmen, I walked around and assisted each child as they wrote what melted their snowman (I reminded them to use spacing, a period and helped them stretch out the words).
[I wrote their translations on the bottom after they left for the day]

Here are a few of our creations and ideas:


Some of the ideas were inspired by the story, others from our interactive writing lists and others were unique and new!

Look at how ADORABLE our display is:


You can find this printable from Loving, Teaching, Inspiring here:
and be sure to check out all her pictures and how-to on this blog post!

Don't forget to check out the Penguin Palooza that is going on Jan 14-19th!
Click for more info:
     

Until next post,

Sunday, January 10, 2016

Martin Luther King Jr. Craft

Last year my son came home with an adorable Martin Luther King Jr. craft:
I snapped this picture so that I would remember to add it to my Martin Luther King Jr. week before adding it to his memory box of crafts and projects from school!

He told me they cut out shapes but I was unable to find the same idea anywhere!
Normally I like to show my kids HOW to make the shapes and then have them do it, but every once in awhile I like to throw in something that requires them to follow step-by-step directions.
Because this craft still has them add personal details, I know each will come out unique anyway!

So after making the tracers, I thought there might be others out there in search of a cute and quick craft for next week, so I put the pieces into a Dropbox link.

Here is my version of it:
using the pieces from the link.

I printed my pieces onto the colored paper, but you could also print them onto white or manila cardstock to make tracers

Once the pieces are all cut I am going to have the students follow step-by-step to 'build' Martin Luther King Jr.:

Step 1: Build the Body
1. Glue the triangle upside down to the body.
2. Glue the head on top.
3. Glue the bow tie under his chin.

Step 2: Build the Face
1. Put glue on the edges of the ears and press behind the head on both sides.
2. Glue the white ovals to the face.
3. Glue the brown circles onto the white ovals.

Step 3: Add Details
Using a black crayon...
1. Put black circles inside the brown circles
2. Add 'sideways U's' to each ear
3. Draw a circle nose and put 2 little circles inside it.
4. Draw lips and add a mustache.
5. Draw eyebrows.
6. Draw hair

You can leave the craft 'as is' or glue it to a colored background.

Looking for Martin Luther King Jr. Resources and/or something to use during Black History Month?
Here is a slide show of what I have in my TPT Store:

This is one of my favorite resources to use in my classroom:
It comes with sentence building cards and 2 versions of an early emergent reader about Martin Luther King Jr. in both color and black & white.

I use the sentence cards whole group as part of our word study block so that they have familiarity with the text and vocabulary words for independent reading time!
They keep the book in their Readers Workshop baggies for the week to practice re-reading and build fluency and then take them home the following week to 'teach' their families what they learned!

If you are searching for more Martin Luther King Jr. and/or black history resources you can find them HERE or click the links below:


Find Black History resources, as well as all February 'themes' in this pack:


Until next post,

Friday, December 11, 2015

Holiday Centers & Candy Cane Word Work!

There is definitely excitement in the air so my motto this time of year is 'if you can't beat them, join them!'
All of my centers for next week are holiday related...
Stamping Center:
The kids will stamp their sight words in the ornaments and then use Holiday Smencils to write the words!
Want to make for yourself?  It's super easy:
Simply insert a table into a PowerPoint document.  Type the words you want and then insert ornament clip art (you can find images for free) to match the number of letters.

The following week (yes...we go until 3:30pm on 12/23!) they will write the letters with white crayon in the lightbulbs and then use watercolor paint over them to 'reveal' the letters to make the lights 'twinkle':
(I copied this one on cardstock to make it sturdier!)

Sight Word Puzzles:
You can find 27 'Ready To Go' Puzzles, plus editable templates for 2-5 letter words here:

My kids LOVE doing these puzzles!  Some weeks they choose to do 2 puzzles instead of going to early finisher baskets!

Listening Center:
They love the Froggy stories!  They will write about/draw what Christmas looks like to them!

Phonics Center:
I am breaking out stockings for this one!
I have 'stuffed' each stocking with pictures and they will reach in and pull out a 'toy'- they will write what letter the picture (toy) starts with!
You can find this editable pack here:

Read It, Build It, Draw It:
The students read the sentence (our sight word this week is 'said') and then build the sentence.  Some students draw and others re-write the sentence.  They then circle 'said' in the sight word reader and practice reading it to a friend.
We do this center every week and it has really helped them with sight word development, concepts about print and given them confidence as readers!
If you are working on 'said' and would like this set, you can download it for free here!

And their new favorite center...
Read the Room:
This will be our second week doing 'read the room' this year.
They will be walking around to find the holiday images.  They will ID what letter the picture on that card starts with and write it on the recording sheet:
It is specific to the letters we are currently working on and my students are having trouble with, but if you can find it useful, as well, I have put it up for FREE in this Dropbox download!

As I mentioned earlier, we go until 12/23, so for the following week I have a candy cane word work activity all prepped and ready to go!

It came from an idea I saw on Pinterest:
  

I thought it was such a cute idea and I shared it on my Facebook page it and it got so many shares!

But I didn't want my students to just glue words without practicing them, so I came up with an idea!
I printed large 'J's' on red cardstock (because I couldn't find a candy cane image without stripes!) and then found a 15-spot spinner from Graphics From The Pond to put all the sight words we have covered onto it!
I then made text boxes for all the words with dotted lines so the kids could cut them out to glue to the candy cane.

(The first set is the set of words you see here, the second set can be edited to fit any words you are working on!)

Each child (or you could have them work in pairs) gets a spinner, candy cane and set of words:

Using a paper clip/pencil, spin a word: 


Find the word that the paperclip landed on in the pile of words: 

and then glue it to the candy cane: 

Continue to spin, read word, find word and glue it to the candy cane until the candy cane is full and/or you have run out of words!
If a word is spun that was already landed on, spin again: 


Extra words can be glued to the back: 

To make the candy cane 'neater' you can trim off the excess white from the word strips: 

And here is your completed candy cane! 

BUT it doesn't have to stop there!
You can then use the candy cane and spinner for a word work game!
Put out some fun pom poms (or holiday erasers, candy, counters, etc!)
Students spin and then cover the word on their candy cane! 

Continue to spin/cover until all the words are covered!


The kids could even take the spinners home and continue to practice and play with their families over holiday break!

If you are still in need of some holiday resources, you can find my free and paid resources here:
and be sure to check out my New Year goodies too so that you are all prepped and ready to kick off 2016!

Wishing you and yours a happy and healthy holiday season!
Until next post.
Related Posts Plugin for WordPress, Blogger...