Crayons & Cuties in Kindergarten Home About Me My Classroom My Shop Image Map


Showing posts with label Writing. Show all posts

Thursday, January 14, 2016

'Sneezy the Snowman' Visits Our Class!

Do you know this amazing winter story?

I was introduced to it last year when I read this blog post on The Primary Pack by Kristen from Loving Teaching Inspiring.
It is actually one of the top visited blog posts on The Primary Pack!

I had never heard of the story but the project looked super cute!

Unfortunately due to so many snow days last year I never got to do it- HOW IRONIC!!

So this year I was determined to include it in my plans!

So this past week we read the story and used it as a springboard for discussions about items that are hot and cold.
We talked about what melts snowmen (things that are hot) and what would be good for a snowman (things that are cold).

We spend 20 minutes at the beginning of our writing block each day engaging in interactive writing.  We are also working on making lists, so we made interactive writing lists this week that were inspired by this book!


Although I loved the idea of the puffy paint for the melted snowman, we simply did not have the time to fit it in, so I opted for construction paper projects.

I showed them how to make a 'melted snowman' and we talked about all the different things a snowman has and would be found in his/her 'melted puddle'

Then I let them get to work!

While they were constructing their snowmen, I walked around and assisted each child as they wrote what melted their snowman (I reminded them to use spacing, a period and helped them stretch out the words).
[I wrote their translations on the bottom after they left for the day]

Here are a few of our creations and ideas:


Some of the ideas were inspired by the story, others from our interactive writing lists and others were unique and new!

Look at how ADORABLE our display is:


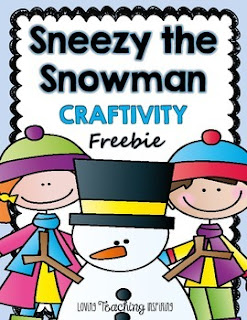
You can find this printable from Loving, Teaching, Inspiring here:
and be sure to check out all her pictures and how-to on this blog post!

Don't forget to check out the Penguin Palooza that is going on Jan 14-19th!
Click for more info:
     

Until next post,

Saturday, October 24, 2015

Hair Gel Writing Practice Bags

Over the summer I attended a sight words workshop at the National I Teach K conference in Las Vegas presented by Mary from Sharing Kindergarten.

She shared her sight word stations and at one station she has the kids practice writing their sight words on hair gel bags!
GENIUS!
No mess- but all the 'tactile fun' of finger paint and/or shaving cream!
She used gallon size bags- since I was making a class set, I opted for quart size!

Fast forward to now where I watch my kinders struggle each day with fine motor issues!
So it was time to make some hair gel bags to practice our letters and numbers!

Now we are all ready for some fine motor

So how did I make these bags?!

I bought 5 bottles of CHEAP hair gel (I wound up only needing 3.5, but will keep the remaining gel to make new bags for those that find too much 'TLC' in their existence!)

I had a box of food coloring I use for playdough making in the cabinet so I was all set to make bags in all colors!

I purchased sandwich and quart size bags. 

I made a writing line 'template' to slide in the bags.

First I squeezed some gel into the sandwich size bag.  I didn't measure it- just eyed it!

Then I added a few drops of food coloring to the gel 

I closed the bag- getting out as much air as I could- and started squeezing and squishing the bag to mix the colors 

This is what it looked like once it was all 'mixed' (it doesn't take long or much effort!) 

I printed the writing line onto cardstock, cut it out and taped the bag to the cardstock template in 3 places across the top

This is what it looked like once it was all affixed to the template 

I slipped the gel bag/writing template combo into the quart size bag and got as much air out as possible before sealing the bag 

Now they are ready to practice writing letters and/or numbers!

'Erasing' is easy!  Simply rub the space back and forth! 

All set to practice the next letter/number! 

Keep them stored flat!
They are also great to have at your guided reading/small group instruction table!  There is no way to break out finger paint or shaving cream during a small group lesson, but these bags serve the same purpose without the mess- or crazy clean up!

They can be used for writing words too!

If a bag happens to 'pop' it is housed inside a second bag so it will be easy to spot a 'leak' before it is too late!

You can make your bags seasonally tinted or go for a rainbow of colors like I did!
Until next post,

Thursday, February 5, 2015

Let's Get Scratching! Valentine Writing Fun & More!

On a recent Pinterest stroll I came across a fun idea....
making your own scratch off tickets!
The particular pin was for a business, but it got my wheels turning....
Who doesn't LOVE a scratch off?!!!!


Next week, as we prepare for Valentine's Day, I know my students will be filled with excitement...it is also the week before our Mid-Winter Recess break...and it also has 'Friday the 13th' in it!  Not to mention the forecast of another snowstorm PLUS over a month of indoor recess!!!  I am going to need a lot of captivating fun to keep them 'grounded!!!'

I got to thinking how I could use these 'scratch offs' for a writing 'treat' on Friday and got right to work making some 'toad'-ally cute cards and 'recording sheet!'

The only 'ingredients' needed are:
packing tape- check!
dish soap- check!
silver metallic paint...nope!

I was thinking it was going to have to wait until the weekend when I could get to the craft store, but decided to try our local 'small town' hardware store!
At first I could not find it on my own, but asked the very kind gentlemen and he directed me right to it!
JACKPOT!!
This particular one was Rustoleum American Accents Craft & Hobby Enamel (Fast Drying Latex)
(the original pin said you could use any metalic paint- acrylic included)

He clearly did not understand my excitement- and when I shared with him what it was for he couldn't believe it!  He even asked me to bring him one when they were done!

So how do you go about making your own scratch-off?!

First print out your cards.  You can have prizes, words, letters, numbers, etc!  The possibilities of how to use these in centers is really endless!

Next is to place a piece of packing tape over the area to be scratched.  
After I got all of my cards covered in just the right spots I realized I could have just laminated them!  It would have been faster AND it would have made the cards re-useable for next year!
Lesson learned!


Next you mix up your 'solution!'
It is 2 parts paint to 1 part dish soap.  
I didn't measure exact- I eyed it!
Mix them together good.  I chose to use a 'big brush' so that it would 'bunch' on the brush and cover it better.


Paint the area you want covered.  Put it on pretty thick- even dab it a bit if it is 'spreading' as you paint.


Let it dry.

If the area is still 'see through' you can do another coat.  I found mine had covered well enough and didn't need the second coat!

Cut the cards apart and they are ready for scratching!


Simply use a coin- scratch it (slide maybe) just like you would a regular Lotto ticket!
And your word, letter, number, message, prize, etc will be revealed!

So how am I using these scratch offs for 'educational' purposes?!


The kids are going to each get a card.   They will scratch to reveal a sight word we have learned, write the word and then use the word in a sentence!
Because I know they are going to want to take it home to show their family, I have a spot for them to glue their card to the paper!


I also made a set to put in their Valentine gift pack:
It has the scratch off for a prize, Smencil and Smarties candies!

It really did not take long to do- I promise!!!
It is something your students are sure to L-O-V-E!!!!

And just think of all the other ways you can use them...
*classroom incentives
*reading log incentives
*parent teacher/conference night 'raffle'- one winner gets a small gift card for attending!
*word work centers
*matching games (scratch a letter/CVC word and match to the picture that starts with it/is the word)

AND SO MUCH MORE!!!!

I am definitely going to be making a 'lucky set' for St. Patrick's Day!!!

Want to give it a try?
Here are the word cards, recording sheet and gift tags to download for FREE!
I even included a copy of the gift topper if you can use it!
It's my Valentine gift to you!

I would love to hear about how your students L-O-V-E-D the scratch offs!!!

Until next post,
post signature

Monday, December 1, 2014

Sticker Stories!

Do your students L-O-V-E stickers?!
If so....have them create sticker stories!!!
 This idea came to me while sitting with my boys!  They were putting stickers on paper....one thing led to another and all of a sudden we were writing a story about the stickers we put on our papers!
My son is in kindergarten, so I had him try and write his story and he had so much fun with it I knew it was something that would help spark some creative writing- with a dash of sight word practice- in my kinders!

I had some left over circle (label) stickers from lollipop favors I made for my son's birthday party and thought....AH-HA...I can make my own stickers!!!
I purchased mine from Amazon- but I am sure you can get them from an office supply store too!
They are Avery 8293.

I made a template, printed the stickers and had my kinders get to work!

Each student had a 'story mat' and a strip of stickers.
This particular set was 'Thanksgiving Table' so they were putting food on the table.
They simply put the stickers on the mat...

and then used the 'picture' they created to write a story! 

I mounted the mat and story on 12x18 construction paper... 

And it made an AWESOME hallway display!  We had also done some interactive writing that week listed foods we have on our Thanksgiving table!


You can find this set, complete with the sticker template and mat here: 
And if you don't have the circle stickers, you can print the template on paper and have students cut/paste.  I also provided the pictures in square form for easier cutting/pasting!

And there is also this set to write stories about The First Thanksgiving:

They were so successful, I got to work over Thanksgiving break and created two Christmas sets and a winter set!

They use the toy/object/person stickers to create and write about a scene from inside Santa's workshop!  They could write about what is being made for them there too!

Santa's Sleigh version:
They will put stickers with toys/objects on them in Santa's sleigh and write about what is in the sleigh- or even what fell out of the sleigh if they choose to put some out of the sleigh!

And the winter set...Snowy Day
This set comes with 3 different story mats so students can decide on what scene they want!  They put the snow fun stickers on the scene and write about what is going on!

I know they are going to have "SNOW" much fun with these sets!
You can find them here:


AND for for today (12/1) through Wednesday (12/3) they are on sale for 20% off!  PLUS if you shop 12/1-12/2 with promo code TPTCYBER you get an extra 10% off!

Happy Sticking....Happy Shopping!
I would love to hear how your stories came out...and I am already planning a TON more for the upcoming months, seasons and holidays!

And don't forget to stop by Zip-A-Dee-Doo-Dah Designs Facebook page for the next 12 days!
Each day 3 amazing TPT authors, as well as Zippy herself, are giving away something from their store (or a credit) PLUS you can enter to win a $30 gift card!
Today's gift card is for Amazon!

Be sure to come back on 12/4 where you will find ME...and some pretty awesome authors...and a $30 Starbucks gift card!
 

Until next post,
post signature
Related Posts Plugin for WordPress, Blogger...