Crayons & Cuties in Kindergarten Home About Me My Classroom My Shop Image Map


Thursday, January 30, 2014

Celebrating 'P' Week...With Penguin Cake Pops!

Well my picture post on Facebook surely stirred up some interest!!

This week my boys, ages 4 and 3 (yes- they are only 15 months apart!) are learning all about letter P- and of course- penguins!

Tomorrow they are to wear their pajamas to school and parents were asked to donate a 'P' snack... the idea of sending in a bag of pretzels, or potato chips or popcorn did cross my mind, but I also LOVE making cake pops!  Hmmm....how can I make 'C'ake pops into a 'P' snack....I got it!  Penguin (cake) Pops!


And here they are!!! Aren't they just 'P'recious?!!!

So the question is...how did I make them?!!

For the 'basic' how-to on making cake pops, first refer to my post from January 1st (click the hyperlink to be taken there!)  I posted a step-by-step tutorial on how to make cake pops- from 'cake' to 'pop!'  I chose for these to do without the stick- I know all too well what the moon has been doing to my kids and can only image the havoc the sticks may cause!  

So once you are up to the 'decorate' part here is how to transform the 'pop' to 'penguin!'

First, in addition the the cake mix, icing and chocolate you need for dipping, you will also need white chocolate melts and orange tic tacs:


Right after you roll the cake ball in the melted chocolate, stick a white chocolate melt right onto its 'belly' (this picture doesn't show it because I only have 2 hands, but it worked best to hold a spoon behind the cake pop as you press the melt on- otherwise you knock the penguin right over!)


Then push the tic tac in as the beak...

Let the chocolate set a bit.  In the meantime, melt a bit of white chocolate and put it into a ziploc bag. Cut the tiniest bit off the tip and squeeze two dots on as eyes.  Let it set.

Do the same for the brown chocolate to make the eye balls.

Let them set and dry and then plate them up!

A perfect palate pleasing treat for P week in winter!

Hope that helps and I would LOVE to hear all about the treats you make!!!

Until next post,
post signature

Wednesday, January 29, 2014

Ditch the Store-Bought Number Line...Have The Kids Create It!

My kinders have been working hard on numbers 0-20...yet my current number line only went from 0-10.  I was about to create one myself (the store bought ones had 0-20...and I didn't need 0-10) when I had a 'vision!'

So I planned it out to see how it would work for both a group less than 10, and one greater than 10.  I had an entire package of smiley smelly stickers unopened that were just screaming to be used!


Each topic we have a flexible review day...this would be perfect...we could review counting to, making ten frames, writing, and ordering numbers 0-20 all in one...and when the 'lesson' was all done, we would also have a classroom number line for 0-20!

I created these two 'templates' that we used:
     

And I strategically picked who would get each number.  Perfect for me I have 20 students...so I took the '0' and handed out the rest!

I wrote their number on a Post-It note and sent them on their way to write, fill in the ten frame and count out the stickers to match the number...


 Then we reviewed number order and they helped me put them in order as we hung them up in our classroom!
It was so long it went over our 'Wonderful Work Wall' and around the corner across the whole back of the room!


It looks fabulous- and I LOVE it so much more than the store-bought version!
Best yet- my kinders feel ownership! Not even 10 min later we found them referencing it during math centers!

Feel free to download the templates and try it out in your own classrooms!

This post is part of the Math Madness Linky hosted by Teaching Momster!
To find more posts about ten frames click this picture:

Until next post,

post signature

A Furry Friend Brings Learning & Fun...and a Freebie!

I am a 'theme' gal...which is sometimes good, and sometimes maddening!

So this week we are talking about the groundhog, so naturally, I had to make my centers 'groundhog' themed!

Here's a peek at my math centers..

We are finally up to ordering to 20, so my kiddos practiced ordering groundhogs from 0-20.  Once they had them ordered, there were 2 b&w printables available.  They could order 0-10, 11-20 or 'take the first grade challenge' and do both so that their groundhog strip went from 0-20.  Because I had 'promoted' it in that way, all that have visited that center have taken the challenge, and in essence, completed the task I had intended!


Onto our number sort!  This is clearly their favorite this week!!  Students reach into the burrow (bag), pull out a card and decide if it is 'less than 10' or 'greater than 10.'  The number lines were a hit and I found many of them referencing it!  Once all the cards (objects, ten frames and numbers) were sorted, they completed the recording sheet- aka my way of number writing practice and assessment! 

Now to a freebie for you!
My students had so much fun with this 'color by ten frame'- groundhog theme!

I had ten frame and number cards for them to reference.  At first they needed some guidance, but by the third ten frame, they were practically independent!  Some even took it upon themselves to 'check off' the ten frames they had already completed! 


All done...looks fabulous, festive and fun...PLUS I know they practiced reading and counting a ten frame and identifying numbers over 20! This gem is now proudly displayed on my wonderful word wall!


Be sure to download your copy in my freebie pack that has this one AND a color by CVC groundhog printable!  We are doing that one tomorrow during word work!  

If your students LOVE the color by ten frame activity, be sure to check out the other sets I have for winter, 100th Day, Valentine's Day, and President's Day! I am working on a Winter Sports set and generic set!  
You can also find a ton of themed packs for Color by CVC word too!

Enjoy the freebie- feedback is always appreciated when you download a resource for free!

Until next post,
post signature

Tuesday, January 28, 2014

Putting A Newsletter 'Freebie' To Good...'SNOW'...GREAT...Use!

Every Sunday TpT puts out its weekly newsletter...and it is best known for featuring 10 fabulous freebies!

This weekend I found quite the treasure...
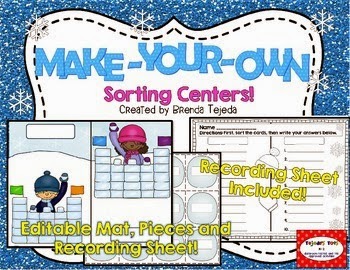
Click on the image above and join the over 16,000 people that downloaded it!!! Be sure to leave her a bit of love via feedback!

It is a mat that you can edit to create a 2-way sort of your choice!  You just click in the box and type what you want!  Super Easy!  It opens right in Power Point- you can change the size of the font, color, type, location, etc!  You can even add clip art (I added thumbs up and thumbs down images I got for free from Krista Wallden to help my kinders)  to the mats and/or recording sheet as you see fit!

Since my kids are working on reading CVC words, I did a 'Real Words' and 'Nonsense Words' sort.  We have also been having discussions about those important vowels and how they can change the meaning of a word, so this worked out perfectly!


I also had some of my kids record the real and nonsense words- and the freebie has the recording sheet for you to program included too!  This center was set up in NO time compared to the hours I sometimes spend!  I typed the words, printed on cardstock, laminated, cut and bagged!


**Management Tip***
Take a crayon and make a line across the backs of the snowballs that all go together in a set.  Then laminate and cut.  That way if a snowball ACCIDENTALLY gets mixed up in a 'snowstorm,' it can easily find its way back to the right 'fort!'

I witnessed my kids actually tapping out and decoding each word- not just 'guessing!'


And the recording sheet helped us practice our handwriting too!

This is from one of my higher groups that could handle a lot of words to sort and record!  WOO WAH!  Even I am impressed!!!


 And I love how I have some 'neat freaks' that had to line them all up and those that just 'sorted' and placed as the 'snowballs fell!'

This activity kept my kids engaged the entire time!  And at the end of the week, these will go into our early finishers basket for us to practice reading and sorting for the rest of winter- and at this rate- winter plans on staying around for awhile!!

I checked out her site and she has these other two sets of ready to go editable sorting mats:


And best yet- it appears she has them on sale!!! I am going to go add the Valentine one to my cart for the next 2 weeks of school- I am thinking of using the 3-way sort she has in there for kids to sort sight words by the amount of letters (2, 3 and 4) and possibly an ending or medial sound sort!  I can't decide!  And do you see the gumball sort on the front of the 'generic set?'  SOOOOO cute!!!

What fabulous newsletter freebies have you found lately?! 

Till next post,
post signature

Monday, January 27, 2014

No 'SHADOW' of a Doubt...My Kinders Are Going to LOVE reading this week!

The excitement of the groundhog is starting to build!  Our whole weeks' centers and read alouds are based on this furry little creature!  But I have one 'trick' up my sleeve that is bound to have them excited to READ!

I started making these a few years ago- I have perfected them over the years!

Here is this year's 'version' of...
Groundhog Burrow Reading Bags!

Aren't they darling!  Yes, they take some prep, but I promise it is worth it!  I took pictures of my 'assembly' of them this weekend JUST IN CASE anyone wanted to give them a try!   Start to finish for all 24 bags was about 40 min- so it wasn't TOO bad!!!

First...
Cut green construction paper to match the size of the bag (approximately- don't get too technical!)
Give the one end a little curvy wave- that will be the 'grass'...

Then...
Fold the paper into 3
Fold down....

and then back up- you want the curvy 'up' part to be slightly smaller than the back portion.

When standing it  looks like this...

Next...
Grab a lunch bag.  This part is a tad tricky to show/explain, but when you do it, I promise it will be easy!
Put the green paper on the front bottom of the bag...

Pull just the front part to meet the green paper..

and staple...

repeat on the other side.

Now your 'burrow' and 'grass' are ready!

Distribute groundhog 'cards' and have students write CVC words, sight words, spelling words, etc on them.  OR you can write the words and photocopy a set for each kid- I like to have them write them for added practice, but depending on your time and student needs/abilities, the latter may be a better option for you!

Students then place the cards in the 'burrow' (bag).    I give each one of my kids a sheet that has 6 groundhogs on it.  I got these adorable pics from Ashley Hughes on TPT.  You can find it, and a TON of other groundhog goodies in my Groundhog Super Pack!

Reach in the 'burrow' and pull out a groundhog (so similar to what happens to poor Phil!!!)
Students read the word- if they get it correct, they put it in the grass...

If not, they put it back into the burrow.  

Continue reaching and reading until all the words are in the grass!

We practice with them for a bit- do partner activities (1 picks, 1 reads) and then I send them home with this little note:

By the time they go home the kids are so super excited about it and LOVE 'plucking' a groundhog to read that I can almost ensure they will want to show it off at home...aka...they are practicing without knowing it!!

You can also use these for addition/subtraction- write the facts on the groundhogs belly and they have to answer it to put the groundhog in the grass!  The possibilities are probably endless!! 

So what groundhog books are you reading this week?  Here are a few of my choices!


 (pictures from Amazon all the books shown above are available on their site as well)

Groundhog's Day at the Doctor was my FAVORITE as a kid- I still use my copy to read to the kids!

Groundhog at Evergreen Road has beautiful pictures and some non-fiction information!

Who Will See Their Shadow This Year? is full of Jerry Palotta humor- plus great for teaching about cause & effect and different types of weather!  I actually had my kids work on matching animal to weather with this book last year using this:

They are calling for cloudy on Sunday...so it would appear the groundhog is going to predict and early spring BUT considering they are forecasting a high of 18 degrees tomorrow, I am not too certain that will be the case!

Hope you and your students enjoy the groundhog reading bags!
Until next post,
post signature
Related Posts Plugin for WordPress, Blogger...